BobsPlumbingVideos.com

Real Life Plumbing Advice for People Who Don't Want To Call A Plumber

  • Home
  • How-To-Fix Videos
    • General Plumbing
    • In The Kitchen
    • In The Bathroom
    • Toilet Repairs
    • Heating Problems
    • Hot Water Problems
  • Plumbing Articles
    • Quick Tips
    • Tool Reviews
    • Bobs Recommended Tools
  • About BPV
    • About Bob Sessa
    • Press Photos
    • Follow BobsPlumbingVideos.com
    • Find a Local Plumber – Coming Soon!
  • Got A Plumbing Problem? Ask Bob

I Need Your Help!

April 1, 2017 By BobsPlumbingVideos Leave a Comment

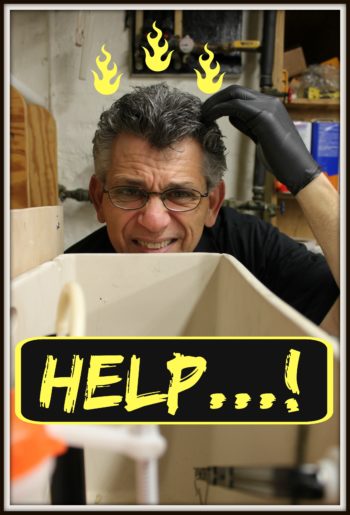
It’s March 31, 2017, and the last video I posted to my youtube channel was on Feb 25th. I’m sitting here in my office with a totally blank slate. So rather than racking my brains out trying to decide what content to create, I’m going to ask my subscribers. I need your HELP! What Videos would you like me to post?

After 40 years in the service business, I lose sight of the fact that my daily adventures don’t seem all that important to me. But I’m probably missing the fact that what comes second nature to me, may be of great interest and really valuable to you. So again I ask, what Plumbing Videos / Basic Plumbing Repairs do you want me to create?

Help!

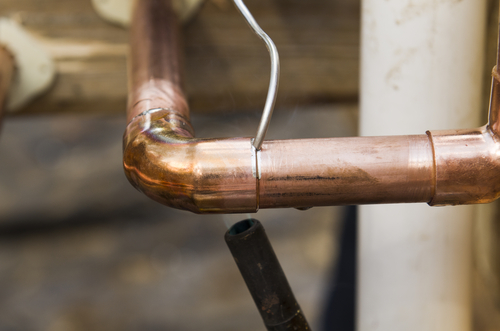
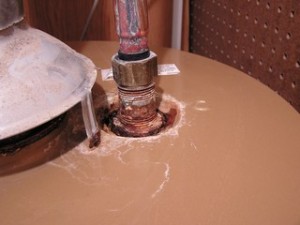
Do you really want to see major plumbing alterations and repairs? Are you more interested in the materials, tools or the techniques to get a job done? Plumbing repair covers a very wide range of tasks ranging from very simple fixes to very elaborate and beyond.

Below I’ve created a simple survey and would appreciate your participation! Simply check off the content you would like me to create more of !

The fact is if you’re a homeowner you’ll most likely be faced with having to call in a plumber at some point. My goal here at BobsPlumbingVideos.Com is to educate homeowners like yourself about the art of residential plumbing repair and in the process help you save your hard earned dollars for basic plumbing repairs.

My equipment is set up and ready to start filming my next video so, please send me your ideas, your thoughts, and suggestions on how I can help keep the plumber out of your life! Regards, and HAPPY PLUMBING!

Bob

Filed Under: Bobs Recommended Tools, General Plumbing, Heating Problems, Hot Water Problems, How-To-Fix Videos, In The Bathroom, In The Kitchen, Plumbing Articles, Q & A, Quick Tips, Toilet Repairs, Tool Reviews

Water Heater Maintenance / Double Your Water Heaters Lifespan

December 7, 2016 By BobsPlumbingVideos Leave a Comment

Should you practice “Water Heater Maintenance“? Are you a pro-active homeowner or are you the type of person that would rather wait until something goes wrong before you call for professional trade services. In a nutshell that sort of answers the question.

Speaking for myself, I’ve performed regular maintenance on my own water heaters for the past 35 years which has allowed them to live way beyond their expected demise according to the manufacturer. If “Water Heater Maintenance” sounds like something that might be of value to you, stay with me.

This past week I had to attend a required seven-hour continuing education course required every three years in order for me to maintain my N.Y. C. Master Plumbers License. I’m up for renewal July 2017. For the most part, we cover plumbing and sprinkler code updates and as a real treat the N.Y.C. Dept. Of Investigations speaks to us about the consequences of getting caught giving bribes to city inspectors.

Then a few manufacturers make their presentations about new products on market and we exchange businessleaking-water-heater cards in hopes of perhaps a sale in the future. Some of the presenters have a hypnotic effect on the group and by about 2 P.M. about a third of the class is either sleeping or zoning out. Finally, it’s 4 P.M. and they start to hand out the certificates.

My name is called, I collect my certificate and thank the host for his thorough presentation. As I’m exiting the door a voice yells out “Bob The Video Guy”! Well besides being embarrassed and quite frankly a little surprised, I turned and it was one of the instructors of the course. I said I guess you caught me, he smiled told me he was a subscriber to my You-Tube channel and said, you should do a video on “Water Heater Maintenance“!

On the drive home, I was plotting out the video in my head when I thought rather than shoot and entire new video on “Water Heater Maintenance” why not just publicize the “Water Heater” module from my preventive home plumbing inspection routine, “The No Brainer Home Plumbing Inspection Checklist“. It’s based on the very same inspection process I practice for my own plumbing customers and hopefully, after watching it you’ll be able to identify potential problems with your water heater and perhaps avoid a plumbing emergency.

I want to give a shout out to Salvatore Mucie for a great presentation and if anyone has any questions on this or any other videos I’ve posted I can always be reached at info@bobsplumbingvideos.com. And I would also encourage you to check out the remaining modules in “The No Brainer Home Plumbing Inspection Checklist“! It might just help keep the plumber out of your life.

HAPPY PLUMBING,
Bob

Filed Under: General Plumbing, Hot Water Problems, How-To-Fix Videos Tagged With: leaking water heater, water heater care, water heater installation, water heater leaking, water heater maintenance, water heater noise, water heater service, water heater tips

Threaded Pipe Sealant, Which One To Use?

October 1, 2016 By BobsPlumbingVideos Leave a Comment

A YouTube viewer reached out to me this past week and made a request That I do a video on threaded pipe sealant.bluetapepipes2 
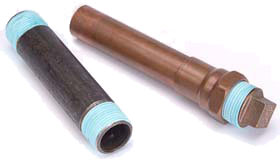
I guess to me pipe threaded sealant is not such a glamorous subject but after a little research, it looks like people want to know this stuff! So I shot the video to give you my thoughts on the subject.

A lot of folks ask the question “do I need to use threaded pipe sealant, what kind should I use or should I use Teflon tape”? Generally speaking I would say it depends on the job circumstances, personal preference, and what you have available at the time. First, let’s talk about pipe threads. Pipe threads are made using a pipe stock & die just like the one in the video below.

They’re tapered by design and as you make up the pipe into a fitting it gets tighter the further in it goes. Tightening is always in a clockwise direction and loosening in a counter-clockwise direction. In a perfect world and a perfect set of cutting dies you should be able to make up a fitting onto a piece of pipe and it shouldn’t leak. But in the real world, there are microscopic imperfections in pipe threads that can’t be seen by the human eye.

Enter “threaded pipe sealant”. To me, the number one reason to use it is to lubricate the male
threads of a piece of pipe which will aid in the tightening process and seal any small inconsistencies in the pipe threads. How tight is tight enough? Well that’s accomplished through feel and years of practice. The fact is you can over tighten a piece of pipe which will cause the female fitting to overly expand (brass pipe in particular) causing to the joint to fail.

The threaded pipe sealants of today have come a long way since I started as a young apprentice. Back then I used a petroleum based product called “pro dope” made by the company Hercules along with a spool of plumbers wick. I would wind the wick in between the male threads, follow it up with an application of “pro dope” and I was good to go.

They still make “pro dope” and I think they’ve even made it more environmentally friendly. Fast forward to the introduction of Teflon Tape and PTFE paste thread sealants, we have many more choices in deciding which one is the best application for the job. I for one generally use a combination of Teflon Tape and PTFE pipe thread sealant on most of the everyday job’s I perform. But that could change at a moments notice.

Which one I use in a specific situation is all going to depend on the job circumstances. If I’m working on pipe that’s in good condition, I’ll use one method. If I’m working on really old questionable plumbing, I’ll use another method or a combination of two or three of the products available. I demonstrate all my techniques in the video below, so why not take a look and tell me what you think. With all the products available on the market, I can see how you might get confused. Hopefully, I cleared up some of that confusion and as usual, if you have questions, please reach out to me at info@bobsplumbingvideos.com.

Best Regards,

Bob

Filed Under: General Plumbing, How-To-Fix Videos Tagged With: blue block, grip, hercules, lampwick, plumbers tape, plumbers wick, ptft, ptft sealant, teflon pipe sealant, teflon tape

Damaged Fitting? How To Seal It!

June 13, 2016 By BobsPlumbingVideos Leave a Comment

A youtube viewer left a comment about how he was trying to remove the brass spud end of an old radiator valve from his cast iron radiator. He stated that while cutting through the brass spud, he cut into the female threads of the radiator. Now he has a damaged fitting and is concerned that he ruined the radiator and isn’t happy about the thought of having to replace it.

I outline that process in my video “How To Cut Off A Steam Valve“ part two. When I’m removing a brass spud from a steam radiator my tool of choice is a Lenox close quarter saw. My second choice would be a good old hacksaw blade which will also get the job done. I personally think that you’re less likely to damage things when you cut by hand.

That being said I know many plumbers like to use their electric or battery operated reciprocating saw which admittedly is quick, but unless you’re experienced in using the tool you can damage fittings and radiators in a flash. Don’t get me wrong, we work in crazy some positions and sometimes even with hand tools I’ve cut into fittings and radiators alike.So when you do compromise a fitting, what do you do?

Well long before Teflon tape came around I used a good old bulletproof spool of lamp-wick.It’s basically a cotton based thread that you wrap in a clockwise direction in between the threads of a piece of pipe or a male radiator spud. Similar to how you would apply Teflon Tape, only it sits down in between the threads and builds as you make multiple passes. But the icing on the cake is a joint sealing compound called Blue Block which if left to set for 24 hrs. will form a leak proof seal and save you the grief of having to remove or replace a fitting.

Hercules manufacturers Blue Block in addition to a product called Grip. Either one will do the trick, but be warned! Wear gloves and be super careful not to get it on your clothes or tools. Lacquer thinner is the only thing that will get it off. So for those of you who find yourself in the unfortunate position of cutting too deep into a fitting or radiator, fear not! Lamp-wick and Blue Block to the rescue. Sure you cut so deep into a fitting that it may have to be replaced, but I would certainly check out my video first.

If you still have a question or special circumstances, I can always be reached at info@bobsplumbingvideos.com. Regards and HAPPY PLUMBING!

Bob

Filed Under: General Plumbing, How-To-Fix Videos Tagged With: damaged fitting, damaged fittings, damaged pipe, damaged radiator, damaged threads, worn threads

Screw,Solder,Push or Press Fittings?

May 30, 2016 By BobsPlumbingVideos Leave a Comment

Should you use screw pipe, soldered joints, push fittings or press fitting technology? Good question with some good choices, so what should you choose? Well from my perspective I will generally try to match what already exists on the job. The majority of homes I work in features screw pipe a.k.a. i.p.s (iron pipe size) which is typically brass pipe. When making small repairs whether inside or outside of the wall I carry an assortment of brass fittings and pipe nipples from 1″ to 6″ in length in half inch increments. If I have to make a larger repair which goes beyond that 6″ threshold I will transition to copper pipe and fittings. Why? plain and simply it would be cost prohibitive to purchase, cut, thread and install brass pipe in today’s world.

When copper become the material of choice over brass pipe I thought there goes the skill required to fabricate a properly working water distribution system but in order to stay competitive the marketplace we had to make that transition. The soldered joint has been a widely accepted method of joining copper pipe for decades and does require a fair amount of skill to be done correctly. Just when you thought skill was back in demand, enter the Push Fitting! UGH! The most popular name associated with push fittings is Shark-Bite. You simply cut, prepare and then push the pipe into the fitting which is held in place by a series of stainless steel teeth that lock onto the pipe. The watertight seal is made by a single “O” ring washer and if you need to disassemble the joint, you can do so by using a removal tool provided by the manufacturer.

copper pipe imageI’m not particularly a fan of Shark-Bite fittings but will admit that I do carry a few couplings and caps in 1/2″ and 3/4″ sizes to make emergency repairs until I can make a permanent repair with a soldered joint. There are several manufacturers who make removable push fittings and they all share the same methods in assembling and removing the pipe. Thankfully at present in New York City we are not permitted to use removable mechanical connectors, and hopefully, they’ll write that into the plumbing code permanently. It’s only my opinion, but I just don’t like them. We are however allowed to use non-removable push fittings made by a few manufacturers and once the pipe is pushed into the fitting, that’s it! The joint is permanent and if you make a mistake, you have to start over again. A little more skill required!

Next is Press Technology which is becoming increasingly more popular especially if you’re performing larger scale renovations. Although the cost of a press fitting is typically four to five times more than the cost of a traditional copper sweat fitting, the savings in labor (no cleaning, fluxing, heating or solder) far outweighs the price difference. You’ll have to make and investment in the Press Tool to the tune of about $2000.00 plus depending on model and manufacturer, but if you’re cranking out a large amount renovation work, you’ll make that investment back in no time. The joint is formed by preparing the pipe which is inserted into the press fitting and then with the appropriately sized set if jaws clamped around the fitting, you pull the trigger and in about seven seconds you have a leak-free joint.

I personally have not invested in the tool because the majority of the work I perform is service and repair work and I can’t justify the expense for the tool or the fittings at this time, but that could change in the future. So in this video, I go over the pros and cons of all of these connecting methods
and hopefully, bring some new light to those of you wondering which one is right for you. And if you enjoy this video I would appreciate you heading on over to You-Tube and give me a thumbs up and also SUBSCRIBE to my channel.

Regards and HAPPY PLUMBING…Bob

Filed Under: General Plumbing, How-To-Fix Videos Tagged With: brass pipe, copper fitting, copper tubing, press fitting, push fitting, screw pipe, shark-bite, sweat fitting

  • « Previous Page
  • 1
  • 2
  • 3
  • 4
  • …
  • 10
  • Next Page »

Voted 3rd Most Popular Site

Connect With Me

facebook twitter google plus youtube

Discover How To Fix The 7 Most Common Home Plumbing Problems Even If You've Never Picked Up A Wrench!

Simply Enter Your First Name & Email Address To Get Instant Access Now!

We will not sell, rent, give away your information. We hate spam too!

Recent Posts

  • Clogged Drain / D.I.Y.
  • Master Plumbers Exam / Practical Test
  • Bathtub Drain Stopper / Trip Waste Assembly

Categories

Like Us On Facebook

Like Us On Facebook

Newsletter · Ask Bob · Privacy Policy · Terms · Sitemap

Copyright © 2026 BobsPlumbingVideos.com · All Rights Reserved · Web Design & Marketing by Urmil Patel