BobsPlumbingVideos.com

Real Life Plumbing Advice for People Who Don't Want To Call A Plumber

  • Home
  • How-To-Fix Videos
    • General Plumbing
    • In The Kitchen
    • In The Bathroom
    • Toilet Repairs
    • Heating Problems
    • Hot Water Problems
  • Plumbing Articles
    • Quick Tips
    • Tool Reviews
    • Bobs Recommended Tools
  • About BPV
    • About Bob Sessa
    • Press Photos
    • Follow BobsPlumbingVideos.com
    • Find a Local Plumber – Coming Soon!
  • Got A Plumbing Problem? Ask Bob

Bathtub Drain Stopper / Trip Waste Assembly

April 28, 2018 By BobsPlumbingVideos Leave a Comment

The Bathtub Drain Stopper / Trip Waste Assembly is found in countless bathrooms across the country and it’s basically a fool proof way of filling your bathtub when taking a bath. Right? Well maybe…

Prior to this modern method of keeping your bath water in the tub, many homes use to have “Standing Waste & Overflow” a tall cylindrical barrel standing next to the tub with an interior plunger which allowed you to stop the water so you could bathe. Drop  the plunger down and it stopped the water, lift it up and the water would drain.

They were eventually phased out (although thousands are still in service today) because they simply are no longer code compliant in most municipalities across the country. Enter the modern Trip Waste Assembly a simple device which can easily be operated by a flick of a lever located in the bathtubs overflow. Flick it up and the water stops, flick it down and the water drains.

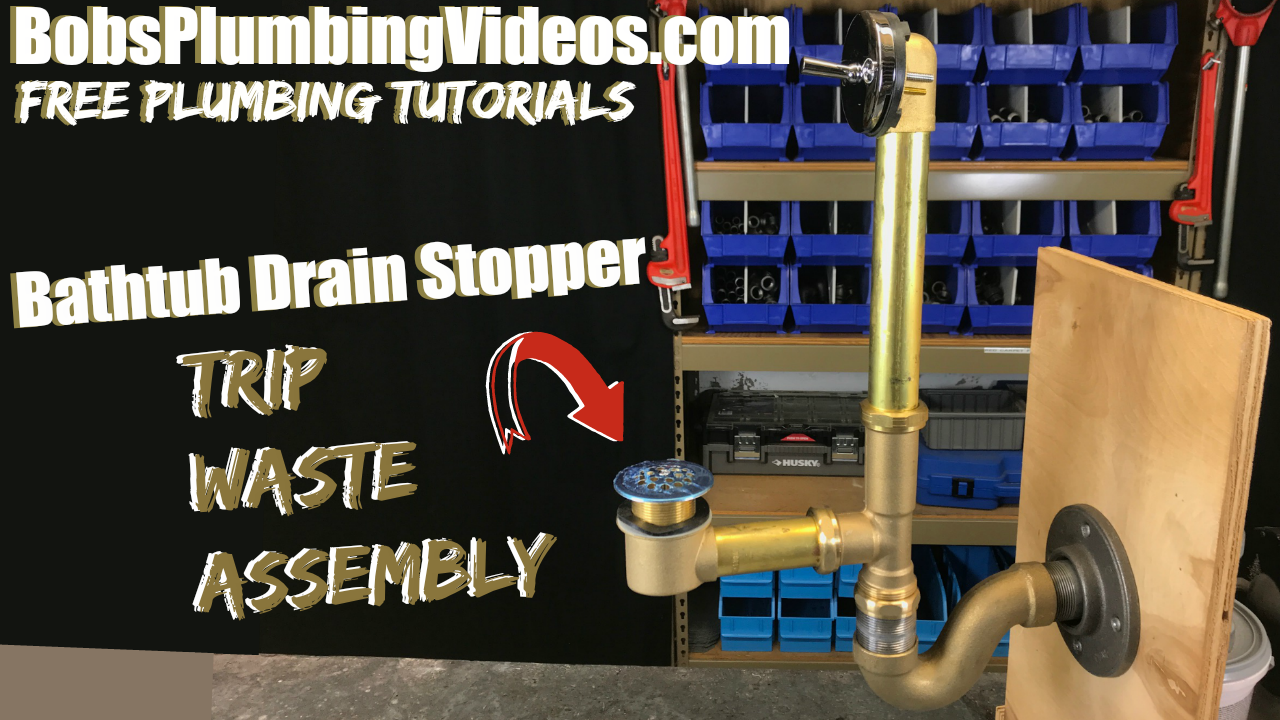
Generally trouble free but as time goes by hair, soap scum and variety of mysterious childrens toys make their way into the drain and interfere with plunger causing it to hang up or not operate at all. In addition the linkage that connects the plunger to the trip lever up top gets loose or completely disconnected.

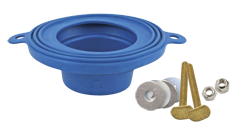
When this happens some minor (or major) adjustments will be required by removing the overflow plate / trip lever assembly and exploring exactly what the issue could be. The overflow is also the access through which you would run an electric snake in the event of a complete tub blockage.

Care must be taken when performing either of these procedures because not all overflows are secured to the tub thru use of a backup plate which is screwed directly  into the overflow tube. If buy chance that overflow tube becomes dislodged from the waste tee inside the wall, you’ll be placing a call into your local friendly plumber (ouch). This is especially true  when trying to clear a stoppage with an electric snake.

An occasional lubrication of the plunger and linkage is always recommended, but care must be taken whenever you remove the overflow plate / trip lever. Check out the video below to have a better understanding of how the bathtub drain stopper / trip waste assembly works. If you get stuck, you can always reach me at info@bobsplumbing videos.com. I hope you’re getting some useful tips from these videos and if so, please subscribe to my youtube channel, give me a thumbs-up  and leave your comments.

Regards & Happy Plumbing,

Bob


Filed Under: General Plumbing, How-To-Fix Videos, In The Bathroom Tagged With: bathtub drain clogged, bathtub drain removal tool, bathtub drain stopper, clogged bathtub, how to replace bathtub drain stopper, trip waste assembly

I Need Your Help!

April 1, 2017 By BobsPlumbingVideos Leave a Comment

It’s March 31, 2017, and the last video I posted to my youtube channel was on Feb 25th. I’m sitting here in my office with a totally blank slate. So rather than racking my brains out trying to decide what content to create, I’m going to ask my subscribers. I need your HELP! What Videos would you like me to post?

After 40 years in the service business, I lose sight of the fact that my daily adventures don’t seem all that important to me. But I’m probably missing the fact that what comes second nature to me, may be of great interest and really valuable to you. So again I ask, what Plumbing Videos / Basic Plumbing Repairs do you want me to create?

Help!

Do you really want to see major plumbing alterations and repairs? Are you more interested in the materials, tools or the techniques to get a job done? Plumbing repair covers a very wide range of tasks ranging from very simple fixes to very elaborate and beyond.

Below I’ve created a simple survey and would appreciate your participation! Simply check off the content you would like me to create more of !

The fact is if you’re a homeowner you’ll most likely be faced with having to call in a plumber at some point. My goal here at BobsPlumbingVideos.Com is to educate homeowners like yourself about the art of residential plumbing repair and in the process help you save your hard earned dollars for basic plumbing repairs.

My equipment is set up and ready to start filming my next video so, please send me your ideas, your thoughts, and suggestions on how I can help keep the plumber out of your life! Regards, and HAPPY PLUMBING!

Bob

Filed Under: Bobs Recommended Tools, General Plumbing, Heating Problems, Hot Water Problems, How-To-Fix Videos, In The Bathroom, In The Kitchen, Plumbing Articles, Q & A, Quick Tips, Toilet Repairs, Tool Reviews

How to Cut Off A Toilet Tank Handle

August 7, 2016 By BobsPlumbingVideos Leave a Comment

This post on “How To Cut Off A Toilet Tank Handle” is going to be a short one, as I agree with that old saying “a picture is worth a thousand words”. In this case, it’s the video below which will unlock my trade secrets. Moving on, we all should know by now that when tightening pipe, fittings, nuts, bolts etc, it’s clockwise to tighten and counter clockwise to loosen or remove. The simplest way to remember this is that popular phrase “righty tighty / lefty loosey”.

But “stop the clock”, when we’re talking about toilet tank levers, that old phrase goes out the window! You see manufacturers figured out a long time ago that by constantly flushing your toilet, the handle would eventually become loose. So enter the reverse thread in which you would tighten to the left and loosen or remove to the right, thus keeping the tank lever from eventually flopping around.

Many older vintage toilet tank levers were made of a cheap white metal composite which would eventually fuse to the threads of the handle making it impossible to remove. Keep tightening in the wrong direction and you’re guaranteed to crack the toilet tank! When that happens the only solution is to cut it off or run the risk of replacing your toilet, especially if you’re not aware of the reverse threads.

Most homeowners aren’t aware and that’s exactly why I made this video “How To Cut Off A Toilet Tank Handle”. So why not check out the video and leave your comments, I would love to know what you think. Remember “righty tighty / lefty loosey” does not apply! As always, you can e-mail your questions to me at info@bobsplumbingvideos.com.

Best Regards & Happy Plumbing!

Bob

Filed Under: In The Bathroom, Toilet Repairs Tagged With: how to cut off a tank handle, how to cut off a tank lever, tank handle, tank lever, toilet lever

Which Toilet Gasket Should You Use?

June 5, 2016 By BobsPlumbingVideos Leave a Comment

Good Question, I think? For this old timer, the good old fashion 100% virgin wax seal has been and still is the most popular way to set a toilet bowl today. That being said, there are new products coming into the market each and every day. Today I’d like to briefly introduce you to two of them which are becoming ever more popular among the do it yourself community.

fluidmaseter gasketFirst up is The Fluidmaster “Better Than Wax” universal toilet seal. This wax-free toilet gasket fits most toilets and is easily re-positionable without the fuss of dealing with wax which can be somewhat messy if you have to re-position the bowl.The company says that once in place, it will create a very tight and effective seal that will resist the effects of average toilet plunging.

It’s made of a somewhat semi-hard rubber material that in my opinion will work just fine if you have a relatively level floor. If the floor is severely out of level and you find yourself having to shim the bowl in order for it to sit straight, this might not be the right choice. Next up is the Sani Seal waxless toilet seal.

The Sani Seal gasket is made of a very flexible polyurethane foam that is re-positionable, sani-seal gasketantimicrobial and functions no matter what the temperature, providing an easy trouble free installation. They both will position the toilet bolts in such a way that you literally can’t miss when setting a toilet bowl. Because the Sani Seal gasket extremely flexible, I think it would be the best choice if your floor is not exactly level.

I personally have not used either of them and that’s not to say they aren’t a reliable replacement for a good old fashion wax gasket. Wax can tend to get messy if you don’t know what you’re doing, so if getting wax all over yourself is something that doesn’t appeal to you, either of these two choices will work for you. If cost is a concern, consider this. A wax gasket will cost you a buck or two, the Fluidmaster gasket will set you back nine or ten bucks and finally the Sani Seal gasket will set you back twelve to fourteen bucks.

I give you my take on both of these products in the video below, so why not take a look for yourself and tell me what you think and if in fact you’ve used either of these products. If you have any questions at all, I can always be reached at info@bobsplumbingvideos.com. I look forward to your questions.

Best Regards and HAPPY PLUMBING!

Bob

Filed Under: How-To-Fix Videos, In The Bathroom Tagged With: re-setting a toilet, setting a toilet bowl, toilet gasket. wax seal, toilet installation, toilet removal, toilet seal, toilet wax, wax gasket

Removing a Frozen Fill Valve Nut !

November 26, 2014 By BobsPlumbingVideos Leave a Comment

So you probably won’t run across this problem to often in today’s world of plastic plumbing parts, so when a you-tube subscriber mentioned he couldn’t remove a plastic coupling nut from his fill valve aka “ballcock” I thought it’s time for a video!

Before we get into removing a frozen fill valve nut here’s a quick history lesson.

Back in the 70’s plastic components were not as popular as they were in today’s plumbing world and the material of choice was good old American made brass. Most of the better companies supplied a brass lock-nut and a brass coupling nut to connect the water supply tube. Eventually and in an effort to save money, some of the companies started shipping these ballcocks with a white metal nickel composite lock-nut and coupling nut.

The problem is that when you connect to dissimilar metals on water carrying components, a process called electrolysis takes place. It would literately fuse the two metals together and make it virtually impossible to break apart. When this happened which by the way was quite often, the only way to separate them would be to cut them off. So whether you were replacing the fill valve or just replacing the water supply tube, you more often than not ended up grabbing the hacksaw and proceeded with the task at hand.

To be honest before I grabbed the hack saw I would always set up a straight 6″ pipe wrench inside the toilet tank and position it at the base of the fill valve with the handle up against the toilet tank. I then would proceed counter clockwise with a second offset 6″ pipe wrench and try to loosen the nut. Bottom line is sometimes I got lucky and sometimes not. The thing is you can’t really put gorilla force on it because you always ran the risk of cracking the tank.

Anyway check out the video and hopefully if you ever find yourself in this position, these tips will help you get the job done with minimal pain.

As always you can send any questions to info@bobsplimbingvideos.com, I’ll be happy to answer them. Until next time,
HAPPY PLUMBING!

Filed Under: How-To-Fix Videos, In The Bathroom, Toilet Repairs Tagged With: fill valve nut, frozen fill valve nut, frozen toilet tank nut, remove a frozen nut, removing a fill valve nut, removing a frozen fill valve nut, toilet repair

  • 1
  • 2
  • 3
  • …
  • 6
  • Next Page »

Voted 3rd Most Popular Site

Connect With Me

facebook twitter google plus youtube

Discover How To Fix The 7 Most Common Home Plumbing Problems Even If You've Never Picked Up A Wrench!

Simply Enter Your First Name & Email Address To Get Instant Access Now!

We will not sell, rent, give away your information. We hate spam too!

Recent Posts

  • Clogged Drain / D.I.Y.
  • Master Plumbers Exam / Practical Test
  • Bathtub Drain Stopper / Trip Waste Assembly

Categories

Like Us On Facebook

Like Us On Facebook

Newsletter · Ask Bob · Privacy Policy · Terms · Sitemap

Copyright © 2026 BobsPlumbingVideos.com · All Rights Reserved · Web Design & Marketing by Urmil Patel