BobsPlumbingVideos.com

Real Life Plumbing Advice for People Who Don't Want To Call A Plumber

  • Home
  • How-To-Fix Videos
    • General Plumbing
    • In The Kitchen
    • In The Bathroom
    • Toilet Repairs
    • Heating Problems
    • Hot Water Problems
  • Plumbing Articles
    • Quick Tips
    • Tool Reviews
    • Bobs Recommended Tools
  • About BPV
    • About Bob Sessa
    • Press Photos
    • Follow BobsPlumbingVideos.com
    • Find a Local Plumber – Coming Soon!
  • Got A Plumbing Problem? Ask Bob
You are here: Home

When To Use a Plastic Ferrule

June 27, 2016 By BobsPlumbingVideos Leave a Comment

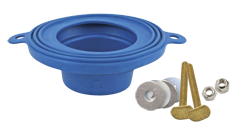
Back in the good old days coming up into the trade, every faucet or toilet I installed was with solid pipe. For faucets we would reduce the 1/2″ water supply lines to 1/4″ using reducing couplings and then we would choose from varying lengths of 1/4″ brass tailpieces to make the connection into the faucet. For toilets there was generally 3/8″ brass riser pipe which fit into the male shank of the toilet fill valve a.k.a. (ballcock). We would use the female nut supplied with the fill valve and make the connection using some ball wick.

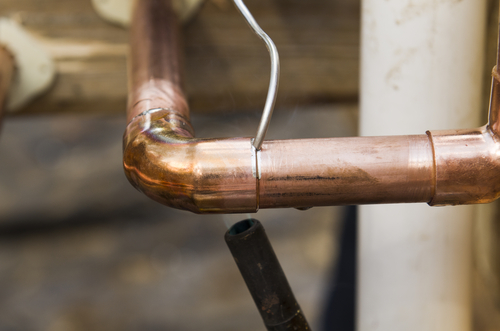
Slowly the chrome plated copper basin and toilet supply tubes made their way into the market which frankly made life so much easier. I still use them today depending on job circumstances, but boy have times changed! Walk into any home center or plumbing supply house and ask for the parts to connect your toilet or faucet and you’ll more than likely get a flexible stainless steel supply tube. Hey that’s progress I guess and truth be told I’ll use them again depending on the job circumstances.

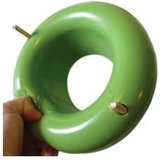
What I won’t use is those braided nylon water supply tubes I see all over the home centers. They are just one big accident waiting to happen and I’ve seen my fair share of them blow right out of their crimp points causing some serious water damage. DON’T USE THEM! . Enter the P.E.X. style water supply tube which to me is something a handyman might use (no offense guys) and truth is I would use them before using one of those braided plastic supply tubes.

The key in using the P.E.X. style supply tubes is to use the plastic ferrule that’s generally supplied with the tube. All to often I’ll come onto a job perhaps to install a new faucet and I discover the last guy used the metal brass ferrule designed to be use with the copper supply tubes. News Bulletin Friends! That metal ring will cut into the tube and maybe not cause a leak instantly but down the road someone is going to be the unfortunate victim of a leaking supply tube and it’ll most likely happen when they’re not home!

Take a look at the video and if you have any concerns or questions concerning P.E.X. style water supply tubes. I’d love to hear from you, I can always be reached at info@bobsplumbingvideos.com.

HAPPY PLUMBING,

Bob

Filed Under: How-To-Fix Videos, In The Kitchen Tagged With: brass ferrule, copper tubing, delta faucet repair, delta faucet repair one handle faucets, delta faucets, ferrule, how to connect faucets, leaking single lever faucet, P.E.X. supply tube, P.E.X. tubing, plastic ferrule, single lever faucet repair, water supply tube

Damaged Fitting? How To Seal It!

June 13, 2016 By BobsPlumbingVideos Leave a Comment

A youtube viewer left a comment about how he was trying to remove the brass spud end of an old radiator valve from his cast iron radiator. He stated that while cutting through the brass spud, he cut into the female threads of the radiator. Now he has a damaged fitting and is concerned that he ruined the radiator and isn’t happy about the thought of having to replace it.

I outline that process in my video “How To Cut Off A Steam Valve“ part two. When I’m removing a brass spud from a steam radiator my tool of choice is a Lenox close quarter saw. My second choice would be a good old hacksaw blade which will also get the job done. I personally think that you’re less likely to damage things when you cut by hand.

That being said I know many plumbers like to use their electric or battery operated reciprocating saw which admittedly is quick, but unless you’re experienced in using the tool you can damage fittings and radiators in a flash. Don’t get me wrong, we work in crazy some positions and sometimes even with hand tools I’ve cut into fittings and radiators alike.So when you do compromise a fitting, what do you do?

Well long before Teflon tape came around I used a good old bulletproof spool of lamp-wick.It’s basically a cotton based thread that you wrap in a clockwise direction in between the threads of a piece of pipe or a male radiator spud. Similar to how you would apply Teflon Tape, only it sits down in between the threads and builds as you make multiple passes. But the icing on the cake is a joint sealing compound called Blue Block which if left to set for 24 hrs. will form a leak proof seal and save you the grief of having to remove or replace a fitting.

Hercules manufacturers Blue Block in addition to a product called Grip. Either one will do the trick, but be warned! Wear gloves and be super careful not to get it on your clothes or tools. Lacquer thinner is the only thing that will get it off. So for those of you who find yourself in the unfortunate position of cutting too deep into a fitting or radiator, fear not! Lamp-wick and Blue Block to the rescue. Sure you cut so deep into a fitting that it may have to be replaced, but I would certainly check out my video first.

If you still have a question or special circumstances, I can always be reached at info@bobsplumbingvideos.com. Regards and HAPPY PLUMBING!

Bob

Filed Under: General Plumbing, How-To-Fix Videos Tagged With: damaged fitting, damaged fittings, damaged pipe, damaged radiator, damaged threads, worn threads

Which Toilet Gasket Should You Use?

June 5, 2016 By BobsPlumbingVideos Leave a Comment

Good Question, I think? For this old timer, the good old fashion 100% virgin wax seal has been and still is the most popular way to set a toilet bowl today. That being said, there are new products coming into the market each and every day. Today I’d like to briefly introduce you to two of them which are becoming ever more popular among the do it yourself community.

fluidmaseter gasketFirst up is The Fluidmaster “Better Than Wax” universal toilet seal. This wax-free toilet gasket fits most toilets and is easily re-positionable without the fuss of dealing with wax which can be somewhat messy if you have to re-position the bowl.The company says that once in place, it will create a very tight and effective seal that will resist the effects of average toilet plunging.

It’s made of a somewhat semi-hard rubber material that in my opinion will work just fine if you have a relatively level floor. If the floor is severely out of level and you find yourself having to shim the bowl in order for it to sit straight, this might not be the right choice. Next up is the Sani Seal waxless toilet seal.

The Sani Seal gasket is made of a very flexible polyurethane foam that is re-positionable, sani-seal gasketantimicrobial and functions no matter what the temperature, providing an easy trouble free installation. They both will position the toilet bolts in such a way that you literally can’t miss when setting a toilet bowl. Because the Sani Seal gasket extremely flexible, I think it would be the best choice if your floor is not exactly level.

I personally have not used either of them and that’s not to say they aren’t a reliable replacement for a good old fashion wax gasket. Wax can tend to get messy if you don’t know what you’re doing, so if getting wax all over yourself is something that doesn’t appeal to you, either of these two choices will work for you. If cost is a concern, consider this. A wax gasket will cost you a buck or two, the Fluidmaster gasket will set you back nine or ten bucks and finally the Sani Seal gasket will set you back twelve to fourteen bucks.

I give you my take on both of these products in the video below, so why not take a look for yourself and tell me what you think and if in fact you’ve used either of these products. If you have any questions at all, I can always be reached at info@bobsplumbingvideos.com. I look forward to your questions.

Best Regards and HAPPY PLUMBING!

Bob

Filed Under: How-To-Fix Videos, In The Bathroom Tagged With: re-setting a toilet, setting a toilet bowl, toilet gasket. wax seal, toilet installation, toilet removal, toilet seal, toilet wax, wax gasket

Screw,Solder,Push or Press Fittings?

May 30, 2016 By BobsPlumbingVideos Leave a Comment

Should you use screw pipe, soldered joints, push fittings or press fitting technology? Good question with some good choices, so what should you choose? Well from my perspective I will generally try to match what already exists on the job. The majority of homes I work in features screw pipe a.k.a. i.p.s (iron pipe size) which is typically brass pipe. When making small repairs whether inside or outside of the wall I carry an assortment of brass fittings and pipe nipples from 1″ to 6″ in length in half inch increments. If I have to make a larger repair which goes beyond that 6″ threshold I will transition to copper pipe and fittings. Why? plain and simply it would be cost prohibitive to purchase, cut, thread and install brass pipe in today’s world.

When copper become the material of choice over brass pipe I thought there goes the skill required to fabricate a properly working water distribution system but in order to stay competitive the marketplace we had to make that transition. The soldered joint has been a widely accepted method of joining copper pipe for decades and does require a fair amount of skill to be done correctly. Just when you thought skill was back in demand, enter the Push Fitting! UGH! The most popular name associated with push fittings is Shark-Bite. You simply cut, prepare and then push the pipe into the fitting which is held in place by a series of stainless steel teeth that lock onto the pipe. The watertight seal is made by a single “O” ring washer and if you need to disassemble the joint, you can do so by using a removal tool provided by the manufacturer.

copper pipe imageI’m not particularly a fan of Shark-Bite fittings but will admit that I do carry a few couplings and caps in 1/2″ and 3/4″ sizes to make emergency repairs until I can make a permanent repair with a soldered joint. There are several manufacturers who make removable push fittings and they all share the same methods in assembling and removing the pipe. Thankfully at present in New York City we are not permitted to use removable mechanical connectors, and hopefully, they’ll write that into the plumbing code permanently. It’s only my opinion, but I just don’t like them. We are however allowed to use non-removable push fittings made by a few manufacturers and once the pipe is pushed into the fitting, that’s it! The joint is permanent and if you make a mistake, you have to start over again. A little more skill required!

Next is Press Technology which is becoming increasingly more popular especially if you’re performing larger scale renovations. Although the cost of a press fitting is typically four to five times more than the cost of a traditional copper sweat fitting, the savings in labor (no cleaning, fluxing, heating or solder) far outweighs the price difference. You’ll have to make and investment in the Press Tool to the tune of about $2000.00 plus depending on model and manufacturer, but if you’re cranking out a large amount renovation work, you’ll make that investment back in no time. The joint is formed by preparing the pipe which is inserted into the press fitting and then with the appropriately sized set if jaws clamped around the fitting, you pull the trigger and in about seven seconds you have a leak-free joint.

I personally have not invested in the tool because the majority of the work I perform is service and repair work and I can’t justify the expense for the tool or the fittings at this time, but that could change in the future. So in this video, I go over the pros and cons of all of these connecting methods
and hopefully, bring some new light to those of you wondering which one is right for you. And if you enjoy this video I would appreciate you heading on over to You-Tube and give me a thumbs up and also SUBSCRIBE to my channel.

Regards and HAPPY PLUMBING…Bob

Filed Under: General Plumbing, How-To-Fix Videos Tagged With: brass pipe, copper fitting, copper tubing, press fitting, push fitting, screw pipe, shark-bite, sweat fitting

Prevent a Plumbing Disaster

May 23, 2016 By BobsPlumbingVideos Leave a Comment

After months and months of procrastination and having second thoughts about it, I’ve finally decided to release my home plumbing inspection process called “The No Brainer Home Plumbing Inspection Checklist” I recorded this series which is a combination of video tutorials, screen capture tutorials and a keynote presentation by me back in late 2015. Why did I wait so long? The true answer is I didn’t think there would be a demand for it, but hey that’s not for me to decide after all I’m the guy you call when the shit hits the fan.

What I’ve done is to replicate the procedure I use for my own service agreement plumbing clients. I will once annually perform this walk thru inspection in their homes looking for small signs of trouble which could potentially turn into a plumbing emergency if left unattended. Generally speaking, if this is a first-time inspection I will always find a multitude of problems brewing that my clients weren’t even aware of.

The goal for me is to find small problems and take care of them before they get out of hand ultimately saving my clients money. This was the thought in creating the “No Brainer Home Plumbing Inspection Checklist” If I could show you where and what to look for, you could then call your plumber and have him take care of the small things before they get out of hand.

When a plumbing emergency takes place, it places a huge financial burden on most of the families I service. A burst water heater, washing machine hose or plastic water connector is all it takes to ruin the family vacation you’ve been saving for all year long. In addition, what most families don’t realize is that their homeowner’s insurance policy is NOT going to cover the plumbers bill. They’ll only pay for the damages caused by the faulty plumbing, the plumbers bill is coming out of your pocket!

Throughout my career, I’ve identified two types of homeowners: Pro-Active or Re-Active, the latter would rather wait until a problem occurs before tending to it. If this is you, “The No Brainer Home Plumbing Inspection Checklist” is definitely not for you. On the other hand, if you are the Pro-Active type who cares about your home and finds value in preventative maintenance, then I encourage you to check out “The No Brainer Home Plumbing Inspection Checklist” You could just end up preventing a plumbing disaster and salvage the annual family vacation.

HAPPY PLUMBING, Bob

Prevent a Disaster Now!

Filed Under: General Plumbing Tagged With: emergency plumbing, emergency plumbing repairs, plumbing check-ups, plumbing disaster, plumbing disasters, plumbing emergency, plumbing emergencys

  • « Previous Page
  • 1
  • …
  • 3
  • 4
  • 5
  • 6
  • 7
  • …
  • 22
  • Next Page »

Voted 3rd Most Popular Site

Connect With Me

facebook twitter google plus youtube

Discover How To Fix The 7 Most Common Home Plumbing Problems Even If You've Never Picked Up A Wrench!

Simply Enter Your First Name & Email Address To Get Instant Access Now!

We will not sell, rent, give away your information. We hate spam too!

Recent Posts

  • Clogged Drain / D.I.Y.
  • Master Plumbers Exam / Practical Test
  • Bathtub Drain Stopper / Trip Waste Assembly

Categories

Like Us On Facebook

Like Us On Facebook

Newsletter · Ask Bob · Privacy Policy · Terms · Sitemap

Copyright © 2026 BobsPlumbingVideos.com · All Rights Reserved · Web Design & Marketing by Urmil Patel